
How to Clean Walls Before Painting? 6 Simple Steps You Can Do Today!
TheToolGeeks.com is a participant in the Amazon Services LLC Associates Program and other affiliate advertising programs. We may earn from qualifying purchases. (Learn More).
Either you are a DIYer or a professional painter, painting a wall is one of those tasks you are happy to take on. It’s a fun activity especially if you are using a highly efficient tool like the paint sprayer.
However, before you get on to spraying or applying paint on the wall, you need to take a few steps to prepare the wall so your work would come out as you envisioned it.
So, how to prep walls for painting? What tools do you need to prep the walls? And should you clean the walls before painting?
You see there is more to know about preparing your walls for painting and this post will highlight the important steps you need to take in preparing your walls for a paint job. So let’s get to it.
[wps_alert type=”light”]Read More — Home Use Sprayers Review[/wps_alert]
Why Should You Prep Walls Before Painting?
You need to prepare the walls before you paint so the resulting finish after painting can be neat, precise, and beautiful. A large percentage of painting failures and oversprays occur from insufficient surface preparation.
When you are painting a wall, breaks, cracks, holes, and dents in the wall will result in a blemish and ruin the finish of the paint eventually.
Preparing your walls before you start painting helps to:
- Improve the quality and finish of your work.
- Improve the durability of the painting so it retains its beauty and lasts for a longer period.
- Make painting the walls easier.
- Remove the dirt and clean the dust on the walls.
- Prevent overspray and paint spatter on nearby floors and objects.
[wps_alert type=”light”]Related Read — Best Spray Guns For Walls[/wps_alert]
Should You Clean Walls Before Painting?
Yes, you should clean the walls before painting. Cleaning the wall before painting ensures that the paint is applied to a clean and smooth wall. If the wall is dusty or dirty, the paint won’t stick well to the wall and you will end up using far more coats of paint than you need.
Not to mention the excess time that will take and all for a finish that wouldn’t even be worth it at the end.
Except you are working with a newly constructed wall, you are most likely to discover dust particles, cobwebs, grime, and dried stains on your walls.
These stains are more common behind wall frames and other objects that have been on the wall for a while. Dust can get trapped behind these objects and sometimes, the stain might be from an earlier fix you made on the wall, especially kitchen walls.
For interior walls, simply use a damp cloth, a bit of a mild detergent, and some warm water to wipe off any dust or stain on your walls.
You can use a spray bottle to apply the warm water to the cloth and then use the cloth to wipe off the dust and stains. A clean wall will bring out a better paint finish.
If you want to clean the exterior walls of your room, you will need to use pressured water. In simpler terms, water rushing from a small hose. The pressure from the water will remove the dirt and dried stains on the walls easily. Ensure the hose is aimed away from windows because the force from the water can break the glass. If you wish, you can add a little bit of mild detergent to the water.
Some painters prefer to use a sponge and warm soapy water to remove the dirt from exterior walls. While this method will work fine, it will take time and you wouldn’t be able to get to some spots except you climb on something.
Using pressured water might be your best bet and if you must, use the sponge and soapy water on areas of the wall where you can reach and aim the hose at areas that prove difficult to reach.
[wps_alert type=”light”]Read More — How To Paint Your House?[/wps_alert]
What Tools Do You Need to Prep the Walls before a Paint Job?
When prepping your wall for a paint job, you need the following:
- Your safety gear. This includes a face mask, a pair of work gloves, and a pair of goggles. While lifting and moving furniture, you can get hurt by a splinter or crack in the wood. A pair of work gloves will prevent that. Also, while cleaning the wall, you will most likely be dealing with dust and dirt particles. A face mask will prevent you from breathing in the dust and a pair of goggles will protect your eyes from the dirt.
- A putty knife. A metallic putty knife is preferred in this case to a plastic putty knife.
- Spackle or Joint compound. You might need both depending on the type of holes and dents you will be dealing with. Spackle compound is more suited to small holes and dents while the joint compound is more suited for larger and broad holes and cracks. We will get to using the spackle and joint compound in just a bit.
- A piece of rag or damp clean cloth (or canvas drop cloths). This would be used for cleaning.
- Plastic sheeting, a large cloth, or a drop cloth for covering floors and furniture.
- Mild detergent
- Warm water
- Tape to hold the drop cloth in place.
- Sandpaper (both coarse like the 80 grit and a fine grit like the 220 grit).
How to Prep Walls For Painting?
There isn’t any general rule for preparing walls for a paint job. The method you use in preparing your walls before painting will depend on the project, the surface area, and the type of paint among other factors.
Though there isn’t any general rule on how to prep walls for painting, there are still some basic rules that work for virtually all painting jobs.
The steps below are well detailed, have been carefully explained, and will help you prep your walls before you begin painting regardless of the type of paint job you want to embark on.
Put on Your Safety Gear
Although this is a DIY project, you still have to protect yourself. Wear your goggles, gloves, and face mask.
Remove Furniture, Electronics, and Other Objects That Are Near the Wall
While painting, it’s possible for the paint to splash on nearby furniture or on the objects that were hung on the walls such as wall clocks. Therefore it’s advised to remove any objects around to prevent those “uh-oh” moments.
Use a Large Piece of Cloth to Cover Furniture That Can’t Be Moved
The last thing you want is for the paint to get on your carpets or floors especially if you have wooden floors. Paint is usually difficult to remove from wooden floors so cover your floors, woodwork, and any furniture or object you can’t remove.
Ensure the cloth you use can hold moisture. You can also double the cloth for maximum protection or use plastic sheets underneath the cloth. You can also use paper tape, or any tape to protect the floor trim or small objects from paint drips.
Remove the Previous Paint on the Walls
This is not usually done but you might need to in your case. Normally, the wall is not primed. It is sometimes sanded to be sure it is ready to absorb the new paint and then the new paint is applied.
If you want to put an entirely different color of paint from the one previously on your walls, then you might need to remove or prime the previous paint.
There are different types of primers out there. Ensure to get the one best for your task. You might need to consult a professional painter or ask the storekeeper for tips.
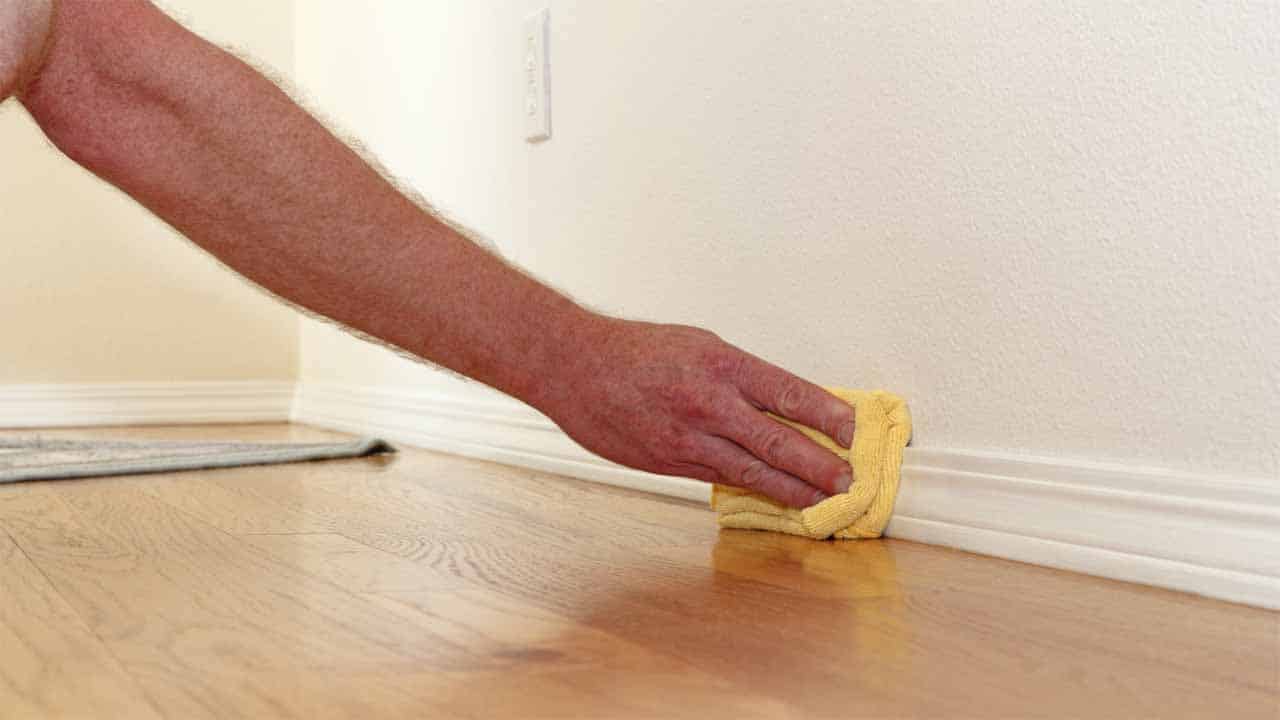
Clean the Walls
It’s very common to find stains on your walls especially when you start to remove the objects on the walls. Dust particles and dirt can be trapped behind wall frames, clocks, and the likes.
That’s why cleaning walls is an important step. Use a clean cloth, a little detergent or cleaning agent, and warm water to wipe off the stains. It’s okay if you can’t get rid of the dirt completely.
The paint will do that for you when applied. Just ensure you wipe off the bulk of the dirt. Washing walls is an important step and it can make or break your project.
Repair Cracks, Holes, and Dents in the Walls
One mistake many painters and DIYers make while painting walls is leaving the damaged parts unfixed thinking the paint will cover them. PAINT WILL NOT COVER CRACKS AND HOLES.
It’s still going to be pretty much obvious by the time you are done and by then, it’s probably too late to fix the crack or dent.
Fixing holes and cracks can be a bit tedious especially if it’s an old building. An old building will have cracks, chip-offs, dents, damages, nail holes, and sometimes rotted nails on and in its walls.
How to Repair Dents and Cracks in Drywall?
You will need a small knife, a putty knife, a clean cloth, sandpaper (preferably a 220 grit sandpaper), and spackle or joint compound.
Start by using the knife to remove any edge or part of the damaged area that sticks out. If you don’t want to do this, you can use the bottom part of your putty knife to press in the edges and parts of the wall that stick out. The process is called making an indent and many painters advise it.
By making an indent, you are filling the cracks and holes with the edges that are protruding. This means all the imperfections in the wall are pressed in and isn’t protruding anymore. Then use the sandpaper to sand the area gently and repeatedly.
After that, use your putty knife to scoop some spackle-compound. If it’s a big hole or dent, you will need to use a joint compound. Spackle compound is more suited for small damages like nail holes.
After scooping the compound, use the putty knife to press the compound into and on the hole. You might need to apply more than one layer of compound.
Just make sure after you apply a layer, ensure it is smooth, and leave it to dry a little before applying the next layer. Then use the sandpaper to sand the area gently until you have a smooth surface.
[wps_alert type=”light”]Related Read — Best Low Volume Low-Pressure Spray Gun[/wps_alert]
How to Repair Cracks and Dents in Concrete Walls?
The method above is best for drywall which is the most common. If you have concrete walls, you might still have hairline cracks on the walls of your room.
Concrete is usually made from a combination of water, sand, gravel, stone, and cement. As the concrete cures (or dries), it begins to shrink and harden, and sometimes, the curing process might cause the concrete to crack.

Also, if it’s an old concrete wall, then chances are you will have holes, dents, and even cracks in the wall which may result from human activity like driving nails into the walls or from time taking its toll on the concrete wall over time.
Depending on how large the crack is, you might need a concrete caulk, drywall compound, or you might need to seal off the cracks with an epoxy concrete sealer or concrete paste. The first thing to do is to clean the wall, and then use the sealer to cover off the cracks and holes.
Step 1: Repair Ridges in the Wall
A ridge is a line that forms on your wall due to different reasons such as a poor paint job the first time. Most of the time, it’s because someone painted over something the first time the paint was applied on the wall.
If you paint on a wall that isn’t properly prepped or you apply paint on a compound or primer that isn’t dry enough, you are likely to encounter ridges after a while.
What you need to do is to use a knife (a putty knife isn’t the best bet but it might work) to remove as much ridge as you can.
Then use coarse sandpaper like the 80 grit sandpaper to sand the surface area until it is smooth. Ensure to be gentle with the knife and the sandpaper so you don’t end up making a bigger gap than you are trying to cover. You might need to use spackle or joint compound if you encounter any indent or gaps.
Step 2: Remove or Unscrew the Wall Outlets and Switches.
You should unscrew the wall outlets than try to cover them with tape or try to paint around them. No matter how careful you are, you would either have paint on the outlet or not paint around it well enough. By removing it, you will be able to paint well with less care.
The first thing to do before unscrewing the sockets and outlets is to switch off the breaker in your home. In simpler terms, cut off all electricity to your home till you are done.
This prevents any case of electrocution. Then you can use a screwdriver to remove the screws holding the cover in place. Take note of where you remove the screws from so you don’t mix them up.
Step 3: Apply Caulk on the Joints on Your Walls
Usually, when inspecting the walls of your room, you will notice that the joints where the baseboard trim and the wall meet have some kind of exposed lining or hole.
You might also notice this opening around door frames or window trims. You will need to apply a layer or two of caulk to touch up and cover those areas.
To ensure the caulk is perfectly applied at a ninety-degree angle, you can press and run your putty knife along the line you applied the caulk on.
Step 4: Ensure the Repaired Areas Are Smooth, Clean, and Dry.
You need to ensure all the repaired parts of your wall are completely dry and then use fine-grit sandpaper like the 220 grit, or sanding block to sand the areas until you have a smooth and fine surface. The 220 grit sandpaper is used for finishing surfaces so it would work just fine in this case.
Step 5: Use Tape on the Walls
This step depends on where you are painting first and the design you have in mind. For instance, if you want the baseboard trim to have a different color from the wall or you want to paint the wall first, then you need to use a painter’s tape to cover the baseboard trims.
If you want to paint a wall with two different colors or you want to have a design on the wall, you will need to use tape to mark demarcations so you know where to use paint and where not to or where to stop using that color.
You might also want to tape the door frames, window frames, and other edges. Ensure the tape is tightly sealed against the surface you paint it on. Tapes would make your work detailed, clean, and neat.
Step 6: You Are Ready to Paint
After successfully prepping the walls, you can go ahead to paint. Do ensure that you pay attention to the repaired areas to be sure the paint sticks well on them.
You can use a paint sprayer or a paint roller for this task. We recommend using a paint sprayer.
If you aren’t quite sure you can use a primer to increase the adhesiveness of the wall so the paint goes on fine. When it comes to painting, you can use latex paint, primer, oil-based paint, etc.
[wps_alert type=”light”]Related Read — The Differences Between LVLP and HVLP Spray Guns?[/wps_alert]
Safety Measures to Follow While Preparing the Walls for Painting
- Ensure you remove all objects from the walls before you begin painting.
- Remove and cover all nearby furniture and floor so that paint doesn’t splash on them.
- Use tape to make boundaries and demarcations on the walls so you know where to paint and where not to.
- Ensure the compound you use be it joint, or spackle is properly applied, and make sure it is completely dry before you go on to paint.
So there you have it, follow the steps above and you are sure to have your walls ready to be painted. Let me know if you have any questions or comments by leaving them below. Have a nice painting experience.
Amazon and the Amazon logo are trademarks of Amazon.com, Inc, or its affiliates.

We’re a team of engineers, contractors, technicians, and woodworking experts who use power tools daily and share fact-based information, tips, and recommendations. At thetoolgeeks.com, we debunk myths about power tools and share methods to use them effectively.