

Fluke 101: Essential Pocket Multimeter for Every DIY Enthusiast
TheToolGeeks.com is a participant in the Amazon Services LLC Associates Program and other affiliate advertising programs. We may earn from qualifying purchases. (Learn More).
Being a DIY enthusiast, you understand the significance of having the right tools for any project. Whether you’re a pro or just starting out, a dependable multimeter is a must-have in your toolbox. Today, let’s dive into the Fluke 101, a compact and accurate pocket-sized multimeter that offers simplicity and portability. We’ll explore its features, advantages, and why it’s an essential tool for every DIYer.
The Fluke 101 – An Overview
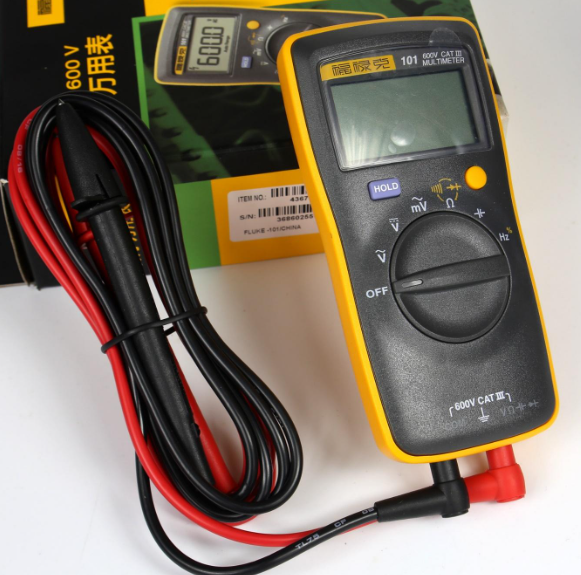
The Fluke 101 is a compact and affordable digital multimeter from Fluke, a renowned name in the electronic test and measurement industry. The 101 model is specifically targeted at beginners, hobbyists, and DIY enthusiasts who require a straightforward device for basic electrical measurements. While it may not have all the advanced functionalities of more expensive multimeters, it delivers exceptional performance for its intended purpose.
Key Features and Functions the Fluke 101
Despite its small size, the Fluke 101 offers a range of useful features:
- a) Voltage Measurement: The Fluke 101 allows you to measure both AC and DC voltage, making it suitable for a wide range of applications, from checking household electrical outlets to testing batteries.
- b) Resistance Measurement: It can measure resistance, which is handy when diagnosing faulty circuits or testing the continuity of wires and components.
- c) Diode Testing: The built-in diode test function enables you to quickly check whether diodes are functioning correctly.
- d) Safety: With safety in mind, the Fluke 101 is rated to CAT III 600V, providing some protection against voltage surges.
- e) Auto-ranging: The meter is equipped with an auto-ranging feature, meaning it automatically selects the appropriate range for the quantity being measured. This makes it beginner-friendly, as you don’t have to manually adjust the range.
- f) Compact Design: The pocket-sized design of the Fluke 101 makes it highly portable, allowing you to carry it anywhere and use it on the go.
Battery of Fluke 101
The Fluke 101 pocket multimeter runs on two AAA batteries, which are the common ones you find in most household devices. These batteries are easy to replace when they run out, and you can access them by opening the battery compartment on the back or bottom of the multimeter using a small screwdriver or even a coin. So, no need to worry about finding special batteries; you can easily get AAA batteries at any store near you!
It’s essential to keep an eye on the battery level indicator on the multimeter’s display to ensure that the batteries are still providing sufficient power for accurate measurements. If the battery level indicator shows a low battery, it’s a good idea to replace the batteries with fresh ones to maintain the multimeter’s performance and avoid any interruptions during your measurements.
Always use high-quality AAA batteries from reputable brands to ensure optimal performance and longer battery life for your Fluke 101 multimeter. Additionally, when the multimeter is not in use, it’s a good practice to turn it off to conserve battery power and extend the life of the batteries.
How to Use a Fluke 101?
Using a Fluke 101 pocket multimeter is straightforward, and with a few simple steps, you’ll be able to make basic electrical measurements with ease. Here’s a step-by-step guide on how to use the Fluke 101:
Step 1: Familiarize Yourself with the Multimeter
Before you start using the Fluke 101, take a quick moment to get to know its various components. It typically consists of a display screen, a rotary dial for selecting functions, and two input jacks for test leads. The jacks are usually labeled “COM” (common) and “VΩ” (voltage/resistance).
Step 2: Check the Batteries
Ensure the Fluke 101 has functioning batteries by checking the battery level indicator on the display. When the battery indicator shows low, simply swap out the two AAA batteries with new ones.
Step 3: Set the Function and Range
- Turn on the multimeter by rotating the dial to the desired function. For example:
- To measure DC or AC voltage, select the “V~” or “V-” position respectively.
- To measure resistance, select the “Ω” position.
Step 4: Select the Range
Once you’ve chosen the function, the Fluke 101 will likely be in auto-ranging mode. However, if it’s not, you can manually select the appropriate range using the rotary dial. If you’re unsure of the expected value, it’s best to start in auto-ranging mode and let the multimeter automatically select the range for you.
Step 5: Connect the Test Leads
Put the black test lead into the “COM” slot and the red test lead into the “VΩ” slot. Make sure the test leads are firmly connected to the multimeter.
Step 6: Measure Voltage or Resistance
Voltage Measurement:
- DC Voltage Measurement: When measuring DC voltage, simply connect the red test lead to the positive terminal of the circuit and the black test lead to the negative terminal.
- AC Voltage Measurement: For AC voltage, it doesn’t matter which way you connect the test leads. You can use either the red or black lead on either side.
- Taking the Voltage Reading: Place the test leads across the component or circuit you want to measure, and the multimeter will show you the voltage on the screen. The display will show you the information you’re looking for.
Resistance Measurement:
- Ensure there is no voltage present in the component you’re about to measure resistance on.
- Disconnect the power source if applicable.
- Simply place the test leads on either side of the component or resistor, and the multimeter will show you the resistance value on its screen.
Step 7: Diode Test (Optional)
The Fluke 101 also features a diode test function to check the functionality of diodes and semiconductor junctions. To use this feature, follow these steps:
- Turn the rotary dial to the diode symbol (often denoted by the diode or arrow icon).
- Connect the test leads to the diode or component, making sure to connect the red lead to the anode (positive) side and the black lead to the cathode (negative) side of the diode.
- When you test a diode using the Fluke 101 multimeter, the display will reveal the voltage drop across the diode, helping you determine if it’s functioning correctly.
Step 8: Data Hold and Auto Power Off (Optional)
If you need to freeze a reading on the display, use the data hold function. Press the “HOLD” button to enable data hold, and the current reading will be retained on the screen until you deactivate the function.
The Fluke 101 is designed to save battery power with its automatic power-off feature. When you haven’t used the multimeter for some time, it will turn off by itself. But don’t worry, you can easily turn it back on by simply switching the dial off and then on again when you need to use it. This way, you can efficiently use the multimeter while still preserving battery life.
Step 9: Turn Off the Multimeter
When you’re done using the Fluke 101, turn the rotary dial to the “OFF” position to power it off. This will also help preserve battery life.
Remember, while the Fluke 101 is a reliable and user-friendly multimeter, always exercise caution when working with electrical circuits, especially when measuring voltages and currents. Make sure you understand the safety guidelines and limitations of the multimeter to avoid accidents and damage to the device.
Purchase the Fluke 101
Fluke 107 AC/DC Current Handheld Digital Multimeter by Fluke, Gray Fluke 117 Digital Multimeter, Non-Contact AC Voltage DetectionImage Product Features Price 
Buy on Amazon 
Buy on Amazon 
Buy on Amazon
Conclusion
The Fluke 101 pocket multimeter is an ideal entry-level instrument for DIY enthusiasts, hobbyists, and beginners. Its simplicity, accuracy, and portability make it a valuable tool for various electrical measurements and troubleshooting tasks. While it may not have all the bells and whistles of higher-end multimeters, it strikes a perfect balance between functionality and affordability.
Whether you’re fixing household appliances, working on electronics projects, or simply learning the basics of electrical measurements, the Fluke 101 is a reliable companion that won’t disappoint. So, equip yourself with this pocket-sized powerhouse, and embark on your DIY ventures with confidence! For more such informational blogs visit The Tool Geeks.
Amazon and the Amazon logo are trademarks of Amazon.com, Inc, or its affiliates.

We’re a team of engineers, contractors, technicians, and woodworking experts who use power tools daily and share fact-based information, tips, and recommendations. At thetoolgeeks.com, we debunk myths about power tools and share methods to use them effectively.