
Do You Need a Heat Gun for Vinyl Wrap: DIY 8 Steps [Follow]
TheToolGeeks.com is a participant in the Amazon Services LLC Associates Program and other affiliate advertising programs. We may earn from qualifying purchases. (Learn More).
Vinyl wrapping is a great way to quickly and easily transform the look of any surface, from car exteriors to glass windows and doors. You must equip yourself with the right tools to ensure success when tackling a vinyl wrap project. Now one question arises, do you need a heat gun for a vinyl wrap?
Heat guns are essential for adequately installing vinyl graphics on various surfaces. You can adjust the temperature of these guns to get just the right amount of warmth. Ensure you don’t exceed 180 degrees Fahrenheit since this will ruin the vinyl’s appearance.
But before you use a heat gun, there are some things you need to know, like the application process, curing time, and other considerations. This blog post will explain all the key insights on using it correctly and when not to use it.
Read on to find out more about these essential tips when it comes to vinyl wrapping.
How Do You Use a Heat Gun for Vinyl Wrap?
Heat guns are essential for anyone looking to wrap their car, truck, or other capable projects in vinyl. Not only do they help apply the material evenly and firmly, but they also make it easier to work with complex shapes and angles.
You can quickly and easily use a heat gun to get professional-looking results on any vinyl wrap job with a few simple steps. Here’s how:
Step 01: Clean the Surface
Ensuring the surface to which the vinyl wrap is applied is properly cleaned first is essential for optimal adhesion. A mild detergent and a clean cloth should be employed to clean any dust, dirt, or debris off the surface.
It’s important that the surface is then fully dried before applying the vinyl wrap, as any traces of moisture may damage or weaken its adhesion.
It is also necessary to remove any oily substance present on the area to be wrapped, as this could interfere with the wrap’s adhesion to the surface. Taking these important steps before applying vinyl wrap will give you peace of mind knowing that your wrap will stay in place effectively.
Step 02: Preheat the Heat Gun
Before applying the vinyl wrap, it is important to preheat your heat gun for a few minutes to ensure optimal temperature control when working with vinyl material. Heat guns can typically be adjusted so that you can set them at a lower temperature for more delicate materials such as vinyl wraps.
Also, a heat gun can help ensure you do not overheat areas with more delicate materials, such as paint protection films or window tints since they can easily melt if heated too much.
Step 03: Start at a Low Heat
When using a heat gun on vinyl wraps, it is advisable to start out with low temperatures first and gradually increase them as needed until you achieve desired results.
This will help prevent any potential damage due to overheating and give you better control over how much heat you apply and how it affects your workpiece material-wise.
Start at lower temperatures and adjust according to experience and trial and error. Instead of heating your heat gun higher and potentially causing irreparable damage to accelerate heating, you’ll save time.
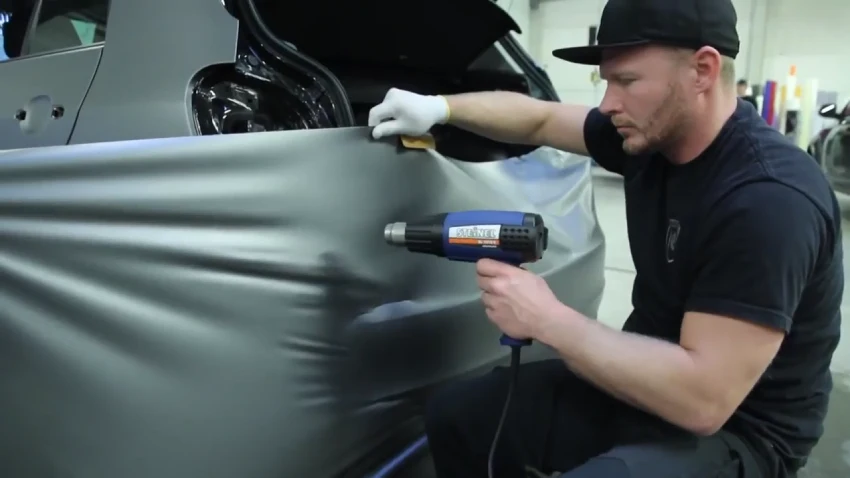
Step 04: Heat the Vinyl
Heating your workpiece with a heat gun is an important step in the vinyl wrapping process, as it helps to soften and shrink the material to fit snugly on the application surface.
Before beginning your project, ensure the heat gun is set at the right temperature level for your material, usually by referring to manufacturer instructions. Hold the heat gun about 5 to 6 inches away from the vinyl wrap while moving back and forth until you’ve achieved the desired softening.
Remember that you don’t produce any warped or melted sections; gap-free installation is crucial for proper adherence! Remaining aware of any inconsistencies from over-brushing will also help you adjust accordingly and guide you toward achieving successful results.
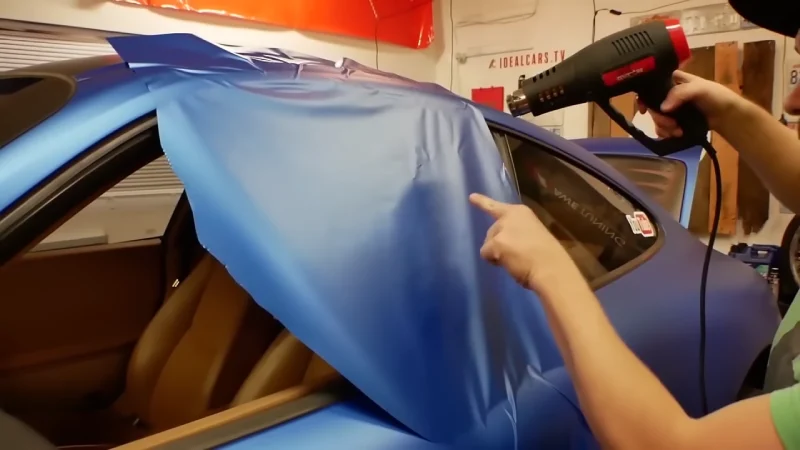
Step 05: Apply the Vinyl
Applying the vinyl with a heat gun requires a few simple steps. First, you must place the vinyl sheet on the area you want to cover. Use a tape measure or ruler to ensure it is even and straight.
Once the vinyl is in place, turn on your heat gun and set it at a moderate temperature. Carefully move it along the surface of the vinyl for several minutes to soften it up. Once soft and pliable, use your hands or a squeegee to press the vinyl into place and smooth out any bubbles or wrinkles.
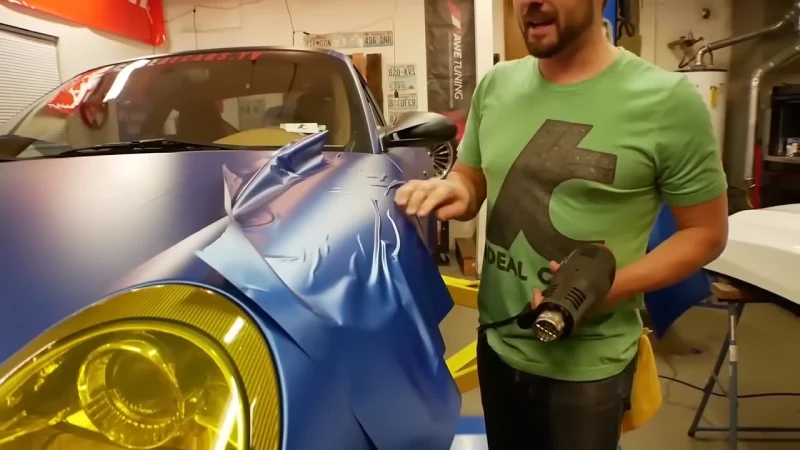
Step 06: Heat the Vinyl Again
After applying the vinyl, you will need to reheat it to ensure that it adheres properly. Move your heat gun over the surface of the vinyl slowly and evenly until it starts to shrink around the edges.
This will help create a tight seal between the edges of the vinyl and its substrate and help ensure that all air bubbles are eliminated.
Step 07: Trim the Edges
Once you have finished heating the vinyl, use a sharp utility knife or scissors to trim away any excess material from its edges. Be careful when doing this, as you don’t want to cut into or damage any underlying surfaces.
After trimming away any excess material, use sandpaper or emery cloth to smooth out any rough edges if needed.
Step 08: Finish With A Final Heat Gun Pass
After trimming away all excess material from its edges, use your heat gun one final time to finish off your job properly. Slowly move your heat gun over all areas of exposed vinyl for several minutes until warm and slightly shrunken in appearance.
This will help create an even finish across its entire surface and seal everything up nicely for longevity purposes.
How Long Does Vinyl Wrap Need to Cure After a Heat Gun Is Used?
Using a heat gun to give your vehicle an attractive and unique look with vinyl wrap is a popular option. But, the amount of time required for the wrap to cure correctly will vary based on the surface material.
Generally, you can expect it to take 24 to 72 hours, but it may be longer, depending on the car paint. Ensure you don’t rush this step to guarantee that your wrap has been applied properly and won’t come undone easily. Wait until the wrap has dried completely before doing any additional work.
Moreover, always read and follow the instructions given by the manufacturer for safe application. Doing so will help you enjoy a beautiful finish that maintains its vibrancy for years!
Can You Use a Hair Dryer Instead of a Heat Gun for Vinyl Wrap?
A hair dryer can be used instead of a heat gun to vinyl wrap, but it is not the ideal choice. Heat gun produces more concentrated and higher temperatures, which makes it easier to soften the vinyl wrap and get it to conform to the surface. Also, a heat gun has stronger airflow, more effective at stretching the vinyl wrap material.
On the other hand, a hair dryer may be able to work with small areas or thinner vinyl wraps if you’re willing to take your time and use patience. You must keep the hair dryer constantly moving to avoid overheating and melting the vinyl material, and start out at a lower heat setting.
So, while a hair dryer can be used for vinyl wrapping in some cases, a heat gun will provide better results for most projects due to its higher temperature and airflow output.
Can You Use Water to Apply Vinyl Wrap Instead of a Heat Gun?
While some vinyl film materials can be applied with water, most installations require a heat gun.
A heat gun is used to warm up the adhesive side of the vinyl graphic and cause it to become more pliable and more responsive to the wrap surface. Heat also activates the adhesive and helps create a strong bond between the graphic and the substrate surface.
The biggest issue with using water instead of a heat gun is that wet applications can make it difficult for the borders or corners of the vinyl graphics to adhere appropriately. It may also cause air bubbles between the graphic wrap surface, which can ruin the overall wrapping appearance of your vinyl installation.
Plus, when applied wet, the material does not always stick in place due to pooling liquid underneath or seeping out from beneath the edges. This will result in an uneven surface, affecting how your vinyl wrap looks once installed.
When Should You Not Use a Heat Gun for Vinyl Wrapping?

Using a heat gun for vinyl wrapping, it is crucial to be aware of when not to use the tool. Heat guns should never be used near rubber, silk, cloth, or other flammable objects.
While most vinyl wrapping projects can successfully be completed with a heat gun, the risk of fire is too high in certain situations, and an alternative must be sought.
To avoid such dangerous consequences, you should ensure that any rubber materials, silk, cloth, and items made from synthetic fibers are always kept at a safe distance from the heat gun.
In addition, if you notice even the slightest hint of smoke near your wrapping area, immediately remove any potential fire hazard before further damage is done.
Using a Heat Gun for a Smooth Vinyl Wrapping Every Time
It is vital to use a heat gun for vinyl wrapping to ensure your wrap looks great and lasts for a long time. By carefully adjusting the temperature setting capable and varying in speed, you can properly apply your wrap without damaging it or causing any other issues.
Be careful not to overheat vinyl when wrapping it with a heat gun. It might damage it. Hairdryers can also be used instead of heat guns for this purpose, but they are less effective than heat guns.
All in all, having access to a quality heat gun is essential when installing vinyl wraps on various surfaces. Be sure you have one before taking on any project, including car paint, glass windows, doors, etc.
Amazon and the Amazon logo are trademarks of Amazon.com, Inc, or its affiliates.

We’re a team of engineers, contractors, technicians, and woodworking experts who use power tools daily and share fact-based information, tips, and recommendations. At thetoolgeeks.com, we debunk myths about power tools and share methods to use them effectively.