How to Sand Glass (Sandpaper or Dremel)?
TheToolGeeks.com is a participant in the Amazon Services LLC Associates Program and other affiliate advertising programs. We may earn from qualifying purchases. (Learn More).
If you have a glass with many scratches and want to remove them without replacing the glass, then you have to sand and polish it.
Sanding glass is not hard, but you need a guide to know what you are doing. Below, we have made a simple but effective three-step guide to help you sand glass easier. We will also cover some common questions people ask before sanding down the glass.
Can You Sand Glass?
Yes, you can sand glass. If a glass has scratches and you want to remove them or smooth the edges of the glass, sanding it is a good idea. However, you can’t use just any standard sandpaper. You need a diamond sand pad with the necessary grit type.
To sand glass, you can use a few tools. I prefer sandpaper, but you can also use a sander or a Dremel. It’s an easy process, but you have to be careful. You can easily break the glass while sanding.
Related Read — Can you Sand Aluminum?
What Tools Do You Need to Sand Glass?
There are a lot of tools you can use to sand glass, but here are the three main tools we recommend:
- Sandpaper
- Sander
- Dremel
If you have to sand small objects, such as your watch face, you can do it without any tools. You can get a few sheets of sandpaper and sand it with your hand; it won’t take a lot of time since it’s small.
But, if you work with medium or big surfaces, you surely need a machine to do the work. I recommend you use an electric sander; you will complete the task faster and better, and you won’t spend a lot of energy on it.
There are a lot of different sander models and types. But what I recommend you use is an orbital sander or a belt sander. They are the most used sanders and do a great job, so they are worth it. If you don’t have a sander, then make sure to check our best sanders for paint removal post.
If buying a sander is not an option, you can use a Dremel. A Dremel is a very small multi-functional tool that can be used for small surfaces. Dremels are a good alternative to sanders since they have a sanding and polishing attachment. And the best part is that they don’t cost much money.
Whenever you choose to use a sander or a Dremel, it’s up to you, but you need to have three of four different sandpapers and a polishing pad. You also need a polishing compound to polish the glass once you sand it.
Read also: Grinder Vs Sander
How to Sand Glass With Sandpaper?
Follow these 5 steps slowly and carefully, and we guarantee you will get excellent results.
Step 1 – Protect Yourself
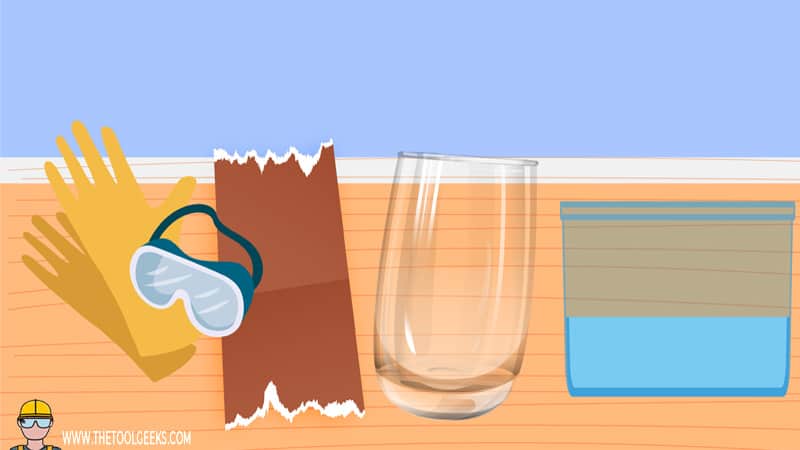
Safety comes first whenever doing any project, especially if you are working with objects or pieces that can hurt you, such as glass. That’s because, while sanding glass, a lot of dust glass or fragments will start to float into the air; they can harm you and nearby people. That’s why it is important to use safety gear.
If you are an avid DIYer or a professional, you may already know this, but if not, you need safety goggles to protect your eyes, gloves, and something to cover your mouth. You can find these items in almost every shop, but there’s a big chance you will also find them in your home since these are essential for almost everything.
Remember that safety comes first, and using safety gear is not optional. You should always wear protective gear when working with these kinds of materials.
Step 2 – Sand The Edges
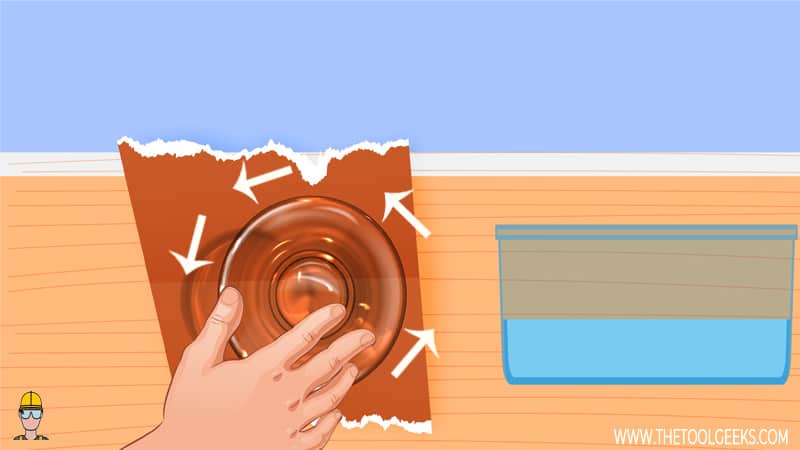
For this step, you need coarse sandpaper. Start with 80-grit sandpaper. This is the first phase of the glass sanding process. It eliminates any bumps and scratches in the glass and creates a flat surface.
Place the sandpaper on a flat surface, and add water to the sandpaper. The water helps the glass move easier and reduces the amount of dust that accumulates during the sanding process. Now, place the glass on top of the sandpaper and move in circular motions. Apply some pressure. Do this for at least a minute.
After a minute has passed, check the glass. Use a dry towel to clean the dust and the water so you can have a clear look. You will notice what parts were sanded and what parts weren’t. If it looks good to you, you can continue to the next step; if it doesn’t, you can sand it again.
Step 3 – Sand The Inner Glass
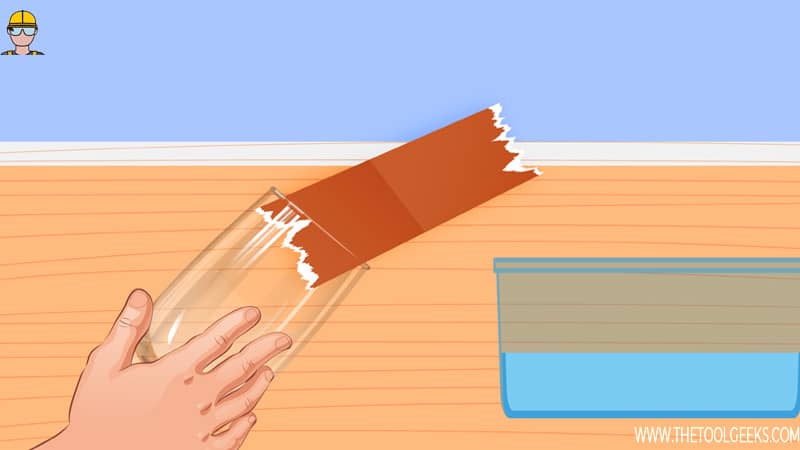
Now that the edges of the glass are flat, start sanding the inner glass. Take the same (80-grit sandpaper) and wet it. Hold the glass with one hand, and start sanding the inner edges with the sander. Don’t go very deep into the glass; you only need to sand the beginning of the inner part.
When done, start on the outer edges of the glass. Repeat the process. Hold the glass with one hand and sand it with the other hand. Be careful while doing this; you can easily cut yourself if you aren’t careful.
Step 4 – Polish The Glass
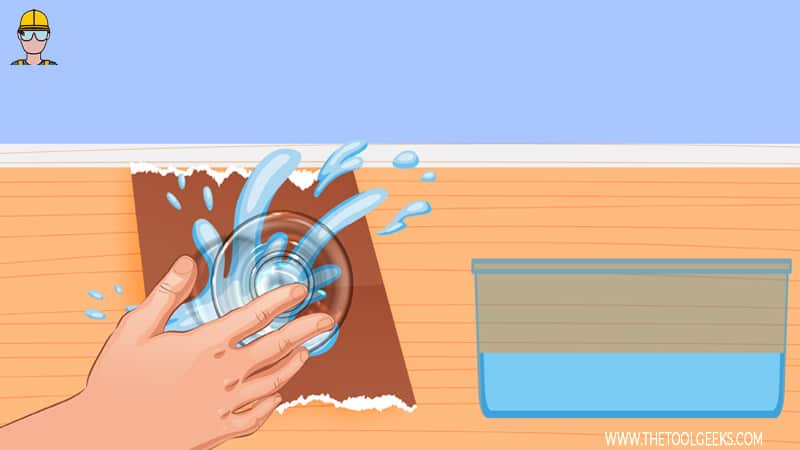
You are done with the sanding part; it’s time to polish the glass. For this phase, you need to start with 150-grit sandpaper.
Do the same process, place the sandpaper on a flat surface and add water. Now, put the glass on top of the sandpaper and start doing circular motions while applying some pressure.
Do this for a minute or more. Once done with the edges, polish the inner and outer glass. Hold the glass with one hand and the sandpaper with the other and start sanding.
The changes in the polish phase aren’t as noticeable as those during the sanding phase. So, you have to dry the glass before noticing any changes.
Step 5 – Move to a Finer Sandpaper
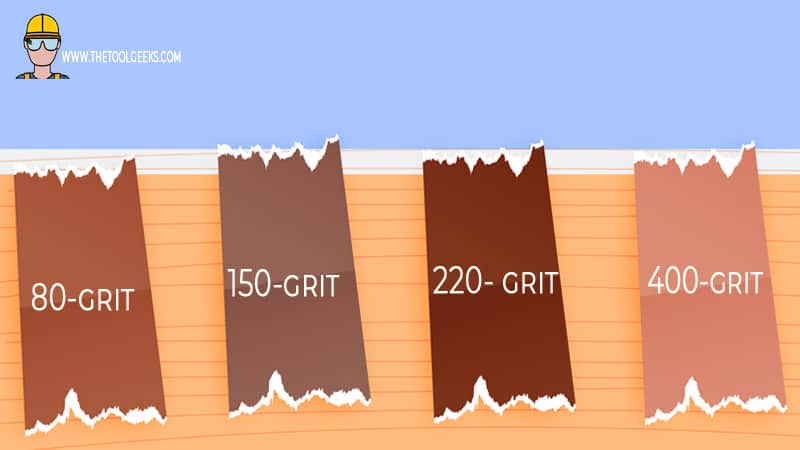
After you are satisfied with the 150-grit sandpaper, you need to move to fine grit sandpaper (220-grit) and do the same. Once you finish with the 220 fine grit sandpaper, you need to move to an even finer grit.
Here is a list of sandpaper grits you should use to sand glass:
- 80-grit
- 150-grit
- 220- grit
- 400-grit
- 1000-grit
- 2000-grit
How to Sand Glass With Dremel or Drill?
Sanding glass with a Dremel is the same as sanding glass with sandpaper. The only difference is that a Dremel does most of the work for you.
Step 1 – Attach a Sanding Bit
Have a bowl of water near you. Place the tip of the Dremel into the water, and put the whole glass into the water.
Once both are wet, start with an 80-grit sanding bit. The sanding bit should be large; the larger it is, the faster you will complete this project.
Just make sure that the bit can fit inside the glass because you will have to sand the inner parts of the glass. Test it before starting the Dremel.
Related Read — Steps on Sanding a Table?
Step 2 – Start Sanding
Hold the tool with your dominant hand and the glass with the other hand. Start the Dremel and sand the inner part of the glass first.
Don’t apply too much pressure, or you can break the glass. The Dremel rotates up to 32,000 times per minute. Light pressure is more than enough.
Once you are done with the inner part of the glass surface, you need to move to the top of the glass and sand it. Do the same process, hold the glass with one hand and move the Dremel into the glass with the other hand. Once you are done with the top part of the glass, you should do the same with the outer part.
Step 3 – Move to a Finer Sanding Bit
Stop the Dremel and check the results. You have to completely dry the glass to have a clear view. If you are satisfied with the results, then you should do the same process all over again but with the finer sand bit.
I’d recommend using a 220-grit sanding bit, then a 320-grit, and so on, until you are happy with the results.
Related Read — Steps on Sanding a Door?
Can You Sand Glass With Silicon Carbide Powder?
Yes! Silicon carbide is another method you can use to sand glass. Silicon carbide is a ceramic used for glass sanding and other applications.
What You Need
- Silicon carbide powder
- Spray bottle
- Glass application
- Protective gear
Step One
Before getting started with silicon carbide, you want to wear the appropriate protective equipment like gloves, a dust mask, and safety glasses.
Step Two
Take the glass item you want to sand and place it on a flat surface like a worktable that has been covered with paper.
Step Three
Use the spray bottle to lightly wet the glass before using the silicon carbide powder. You will sand with one hand and hold the glass firmly with the other hand.
Step Four
Circle the glass with the powder very slowly. Stay only on the glass surface and use light pressure as you rub in the powder. After about a minute, check the edges of the glass. If it no longer has a sharp edge and has a smooth finish, you have effectively used the treatment. Continue the steps if you don’t have the desired result yet.
Sanding Down Broken Glass
To sand down broken glass, consider using silicon carbide sandpaper. It is a sharp and hard abrasive. However, keep in mind that it lacks durability as it is more brittle than other sandpaper types.
Because of this narrow particle size, you will find that silicon carbide sandpaper wears down much faster. Since the grains are sharp, they can be used to sand down glass as well as metal, marble, stone, cork, and plastic, using minimal pressure and effort.
Silicon carbide is a 180 fine grit sandpaper, allowing you to achieve the best glass finish after sanding.
How to Make Glass Shine After Sanding
Once you are done sanding your glass surface, it is time to restore its shine. To do this, wet a cloth with some glass polish and rub the glass polish onto the sanded glass surface. You want to make sure the entire glass item is coated with a thin but even layer of polish. Let the polish dry for at least fifteen minutes.
Does Sanding Glass Make It Appear Frosted?
Regular sanding, as described above, will not necessarily cause the glass surface to appear frosted. However, a sandblasting technique can be used on clear glass to achieve a frosted appearance.
To do this, sand is blasted with a high-pressure air machine. This causes etches in the glass surface, resulting in decorative frosting for more appeal.
Don’t want to use the sandblasting technique? Try 80 grit diamond sandpaper instead. Wet the sandpaper, place the edge of the glass or wine bottle you want to frost onto the sandpaper and use circular motions. Fold the diamond sandpaper in half to sand fine lines or narrow areas of the glass.
Do You Need to Sandpaper Glass Before Painting It?
While not absolutely necessary, sanding glass before painting is a good idea because it gives the glass surface more texture and something for the paint to grip. This results in much better adhesion.
To sandpaper glass before painting, clean the glass and let it dry completely. Then use a coarse sanding block to achieve the texture you need for paint.
Can You Use Wet and Dry Sandpaper on Glass?
If you have fine scratches on the glass you want to get out, then wet sandpaper will work wonders. Wet the glass surface as well as the sandpaper. The water will act as a lubricant. You don’t want to sand glass that’s completely dry.
When sanding, use a circular motion and scrub the surface. You will immediately start to notice those fine scratches disappear.
Final Words
Take your time. Don’t rush things. Make sure you have sanded the entire area with one sandpaper before using another. And after you are done with each step, always clean any dust or water away before continuing to the next step.
If you don’t get a smooth surface, you can just re-do the whole process since it won’t take more than 10 minutes.
Once you do this a few times and practice more, you can get the best results with one take, but until that time comes, make sure to re-do each step until you are satisfied with the look of your glass.
Learn Also — How to sand your car?
Amazon and the Amazon logo are trademarks of Amazon.com, Inc, or its affiliates.
