
How to Do Knockdown Texture?
TheToolGeeks.com is a participant in the Amazon Services LLC Associates Program and other affiliate advertising programs. We may earn from qualifying purchases. (Learn More).
Knockdown texture is a popular wall finishing technique that adds depth and visual interest to your walls. It involves creating a textured surface with a slightly flattened appearance. In this step-by-step guide, we will walk you through the process of achieving a knockdown texture for your walls.
What is Knockdown Texture?
Knockdown texture is a popular wall finishing technique that involves creating a textured surface with a slightly flattened appearance. It is often used to add depth, visual interest, and a subtle decorative element to walls. The name “knockdown” refers to the process of lightly flattening the peaks of the texture after it has been applied to the wall, resulting in a textured surface that is visually appealing but not as pronounced as other texture techniques like popcorn or orange peel.
The knockdown texture is achieved by applying a layer of joint compound or a specialized texture product to the wall surface. The compound is then manipulated or textured using various tools, such as a trowel, taping knife, or a knockdown texture sponge. The texture is typically created by creating small peaks or patterns on the wall’s surface, which are then partially flattened by lightly pressing or “knocking down” the peaks.
The knockdown texture can vary in its intensity and pattern, depending on personal preference and the specific technique used. It can range from a subtle, fine texture to a more pronounced and pronounced pattern, depending on the application method and the texture product used. The texture can also be customized further by adjusting the pressure applied during the knocking down process.
Knockdown texture is a versatile option for both new construction and remodeling projects. It can be applied to various wall surfaces, including drywall, plaster, or even textured wallpapers, adding a unique visual element to any room. The texture can be left as is or further enhanced with paint or a topcoat, allowing for endless possibilities in terms of color and design.
Overall, knockdown texture offers an attractive alternative to smooth, plain walls, providing a textured and visually appealing surface that adds character and style to interior spaces.
What are the Benefits of Knock Down Ceiling Texture?
Knockdown texture offers several benefits that make it a popular choice for wall finishes. Here are some key benefits of knockdown texture:
- Visual Appeal: One of the primary benefits of knockdown texture is its ability to add visual interest and depth to walls. The texture creates a unique and textured surface that enhances the overall aesthetics of a room. It can complement various interior design styles, from modern to traditional, and adds a touch of sophistication.
- Conceals Imperfections: Another advantage of knockdown texture is its ability to conceal minor imperfections on the wall surface. It can hide small dents, scratches, or unevenness that may be present on the wall, creating a more seamless and uniform appearance. This makes it an excellent choice for older homes or walls with blemishes.
- Durability: Knockdown texture is known for its durability. Once applied and properly finished, it creates a strong and resilient surface that can withstand normal wear and tear. The texture helps to protect the wall from minor damages and can make it more resistant to dings or impacts.
- Sound Absorption: The texture’s irregular surface helps in absorbing sound waves, making it a suitable choice for spaces where noise control is desired. The texture can help to reduce echo and improve acoustics within a room, creating a more pleasant and comfortable environment.
- Easy Maintenance: Knockdown texture is relatively easy to maintain compared to other textured finishes. It doesn’t collect as much dust or dirt as rougher textures like popcorn, making it simpler to clean. Occasional dusting or light wiping with a damp cloth is usually sufficient to keep the texture looking fresh and clean.
- Versatility: Knockdown texture offers versatility in terms of customization. It can be applied in various intensities, from a subtle texture to a more pronounced pattern, depending on personal preference. Additionally, the texture can be painted or tinted in different colors to suit the desired decor style, allowing for endless design possibilities.
- Cost-Effective: In comparison to some other decorative wall finishes, knockdown texture is relatively cost-effective. It requires basic materials and tools, making it an affordable option for homeowners who want to add texture and visual appeal to their walls without breaking the bank.
Materials and Tools
Collect the following materials and tools before you begin:
- Joint Compound (solid that requires mixing or ready-to-spray)
- Taping Knife
- Knockdown Texture Sponge
- Spray Bottle
- Sanding Block
- Drop Cloths
- Painter’s Tape
- Safety Goggles and Gloves
Steps to Do Knockdown Texture
Step 1: Prepare the Room
Start by preparing the room for the knockdown texture application. Remove any furniture, cover the floors with drop cloths, and protect baseboards with painter’s tape. This will ensure that the texture only goes where you want it. Additionally, wear safety goggles and gloves to protect yourself during the process.
Step 2: Prepare the Wall
Ensure that the wall is clean, dry, and free from any imperfections. Fill any holes or cracks with joint compound and allow it to dry. Once dry, sand the patched areas with a sanding block to create a smooth surface. Clean the wall with a damp cloth to remove any dust or debris. This preparation will ensure a better application of the knockdown texture.
Step 3: Mix the Joint Compound (If needed)
If you have traditional joint compound that needs mixing first before applying it to the surface, follow the manufacturer’s instructions to mix the joint compound. Use a taping knife to transfer a small amount of the compound to a clean bucket. Gradually add water while stirring until you achieve a thick, pancake batter-like consistency. Be careful not to make the mixture too thin, as it may result in a weaker texture.
Alternatively, you can buy ready-to-spray texture compound that you can shake and spray directly onto the surface, while skipping this step and proceeding directly to Steps #4 and #5 below.
Step 4: Apply the Joint Compound
If using joint compound that requires mixing, then use the taping knife, apply a thin layer of the joint compound to the wall in a smooth and even manner. Allow the compound to set for a short while, typically around 10 to 15 minutes, or until it is firm but still slightly wet.
Apply in small sections and follow Step #5 below to ensure the compound doesn’t dry before you can create the texture. If the compound does accidentally dry before you can create the texture, then sand it off the wall or ceiling and start over with the compound application.
Alternatively, if you purchased joint compound in a ready-to-spray format, then spray the compound onto the surface, still working in small areas to avoid it drying before creating the texture. Once you have created the texture, then spray onto the next area of the surface and repeat. Many of the ready-to-spray joint compounds are water soluble and can be removed with water if needed, such as in the case of it drying before the texture has been created. In the worst case, sanding it off and starting over will work.
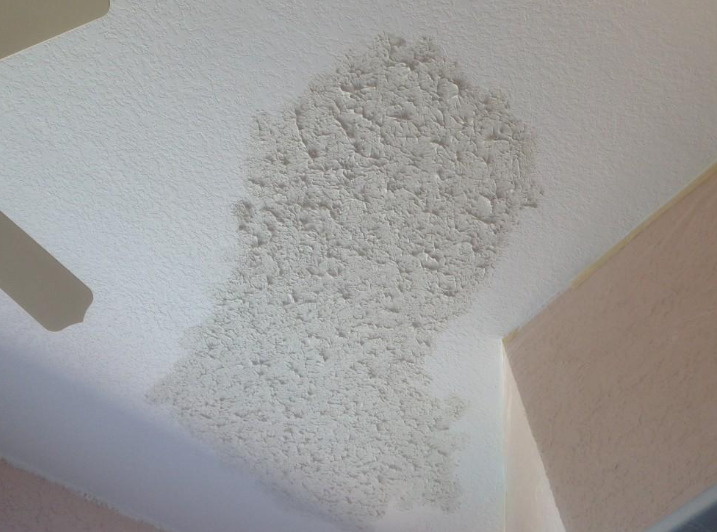
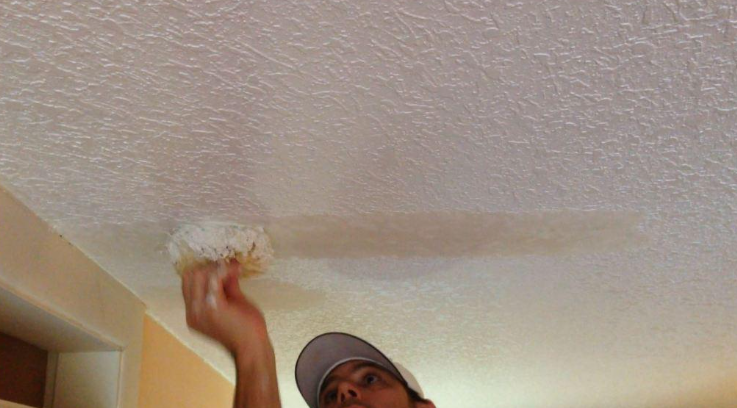
Step 5: Create the Knockdown Texture
Take the knockdown texture sponge and lightly press it onto the wet joint compound, moving it in a circular or random motion. Apply moderate pressure to flatten the peaks of the texture, but don’t press too hard to avoid removing too much compound. This creates the desired knockdown texture effect. Continue this process across the entire wall, working in manageable sections.
Alternatively, you can use the taping knife to knock down the texture for smaller areas. Hold the knife at a 30-degree angle to the wall or ceiling and scrape the wet joint compound with a consistent motion.
Step 6: Finishing Touches
After applying the knockdown texture to the entire wall, allow it to dry completely according to the manufacturer’s instructions. Once dry, lightly sand any rough spots or high points with a sanding block to achieve a smooth finish. Clean the wall to remove any dust residue. At this point, you can paint or apply a top coat of your choice to enhance the texture further.
Conclusion
Achieving a knockdown texture for your walls is a rewarding project that adds character to your space. By following the above step-by-step instructions and taking your time, you can achieve a professional-looking knockdown texture that enhances the beauty of your home.
And if you want to get started with putting a knockdown texture on your wall, ceiling, or other surface, you can easily purchase the required materials from the table below.
Purchase the Required Materials
Homax 41072083607 Wall and Ceiling Dry Mix Texture 15 lb, Orange Peel and Knockdown Texture Homax-41072022132 Knockdown Knife, 7-1/2", Texture Finishing Homax 41072040655 Aerosol Wall Texture, Knockdown, Water Based, 20 oz, White Homax Decorative Roll On Wall Texture White, Smooth Finish, 2 gal, 256 Fl Oz (Pack of 1) Maxmartt Texture Paint Rollers, Texture Pattern Paint Roller Brush Homax 41072041218 Texture Touch Up Kit, Wall and Ceiling Texture and SprayerImage Product Features Price 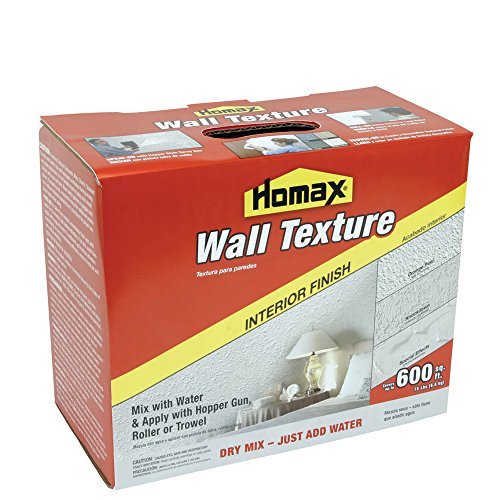
Buy on Amazon 
Buy on Amazon 
Buy on Amazon 
Buy on Amazon 
Buy on Amazon 
Buy on Amazon 
Buy on Amazon 
Buy on Amazon 
Buy on Amazon
Amazon and the Amazon logo are trademarks of Amazon.com, Inc, or its affiliates.

We’re a team of engineers, contractors, technicians, and woodworking experts who use power tools daily and share fact-based information, tips, and recommendations. At thetoolgeeks.com, we debunk myths about power tools and share methods to use them effectively.