How to Sand a Door With an Electric Sander
TheToolGeeks.com is a participant in the Amazon Services LLC Associates Program and other affiliate advertising programs. We may earn from qualifying purchases. (Learn More).
Do you ever wish to sand the wood door at your home but don’t know how to use an electric sander? Or just want one but get confused with the different types?
After all, you cannot use a fine-grit sandpaper or sanding block for long! Hand sanding takes a lot of effort and can leave deep scratches.
Don’t worry; we’ve got you covered! An electric sander can help you get things done quicker and more precisely. However, there are numerous varieties, making selection difficult for a novice. Besides that, not all will work for a hands-on learner like yourself.
So, let us explain the various kinds and advise you on how to use them effectively. But first, let’s compare some electric sanders.

Why Use an Electric Sander to Sand a Door
Easy to Use
An electric sander is incredibly easy to use because of its ergonomic design. It can easily finish and smooth out any surface you’re working on. To use an electric sander, it is important to hold it straight and not tilt it. You don’t have to apply any pressure while using an electric sander, which means less effort.
Speedy
If you sand a surface using your hands, it will take a lot of time. An electric sander does the job very quickly, as it smooths the surface rapidly. It quickly removes the material from the surface and also removes any residue.
Versatile
An electric sander is versatile; besides finishing a door, you can also use it on the floor and stairs. Plus, you can use an electric sander for sanding down furniture, walls, counters, and cabinets.
Types of Electric Sanders
 There are different types of electric sanders, depending on the job type, wood type, surface size, and power level required. Make sure you keep it moving, no matter which type of electric sander you use to sand a door. Leaving the sander in one spot will over-sand the area and make it look different from the surrounding areas. The following are the different types of electric sanders that you can choose from:
Orbital Sander
An orbital sander is the most common electric sander and the best sander for removing paint from wood. This type of sander is suitable for small projects, as you can use it with one hand because of its compactness. It is also available more readily and affordable than other electric sanders.
An orbital sander has a square-shaped sanding plate that moves in a circular motion. The sanding paper or plate is attached to the device using clamps. These sanders are good for smoothing sharp edges or clearing putty. You can use an orbital sander if you’re a beginner, but it is not recommended for heavy work.
Palm Sander
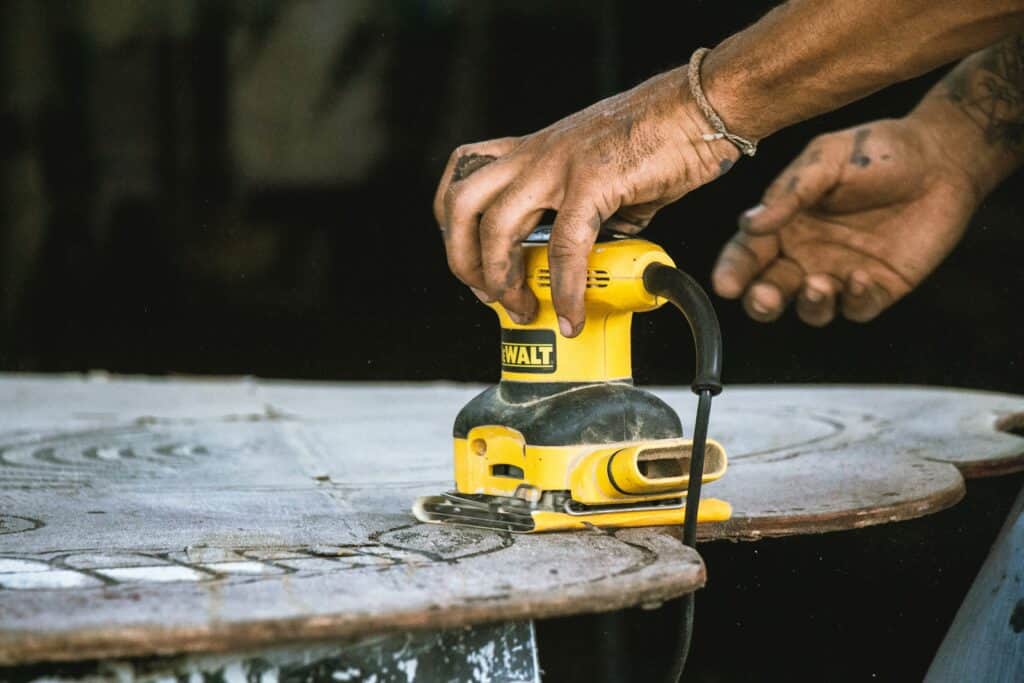
A palm sander is another good option for beginners. A palm sander also contains a square-shaped sanding plate like the orbital plate and is usually smaller and less powerful. It is small, lightweight, easy to control, and designed to be held and controlled by the palm of your hand, hence the name. It consists of clamps attached to a sanded sheet joined to an orbital rubber pad. They are suitable for sanding in tighter spaces, for smaller projects., and for precision sanding.
You might mix a palm sander with an orbital sander, but both are different. We compared the palm sander vs. orbital sander to find the differences. Also, a palm sander is not a good option if you intend to paint your door; an orbital sander will do a better job in this regard.
Belt Sander
A belt sander is a standard tool in professional workshops. A belt sander has a sanding belt that goes over two wheels. The wheels are powered by electricity and drive the movement of the sanding belt. This type of sander is suitable for quickly removing large amounts of material and achieving a smooth finish.
To help you choose between a belt sander and an orbital sander, we did a belt sander vs. orbital sander comparison. A belt sander is more powerful, and it can strip down rough surfaces or remove a piece of wood quickly. On the other hand, an orbital sander is more useful for finishing wood surfaces and removing imperfections.
Random Orbital Sander
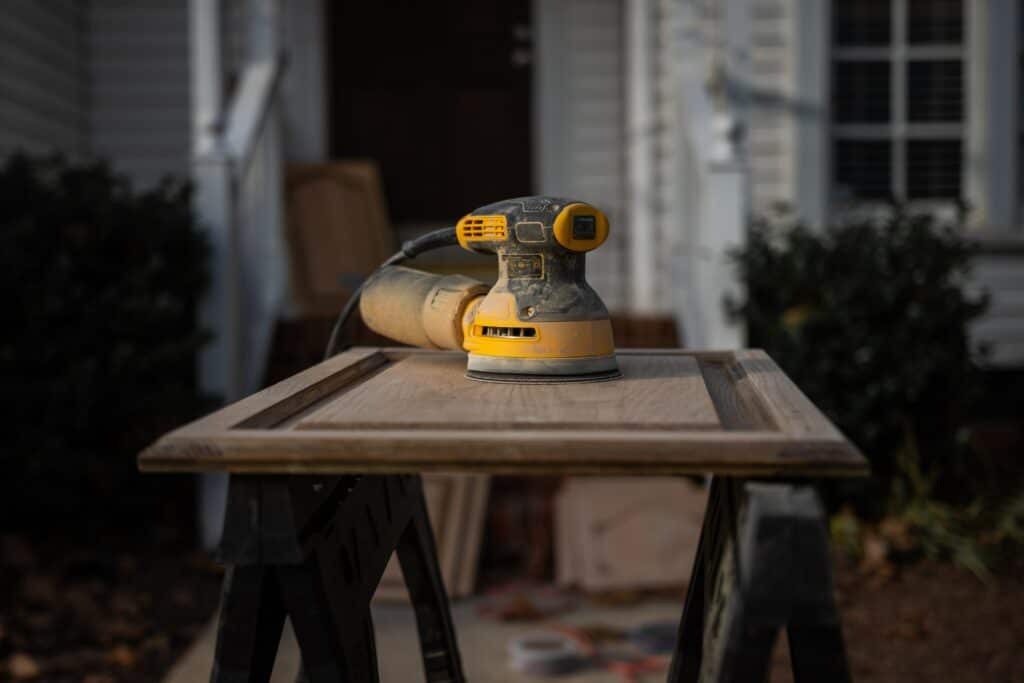
A Random Orbital Sander combines the benefits of orbital and belt sanders. Although similar and often confused with an orbital sander since it is found in many hardware and home improvement stores, the main differences are its motion and the shape of the sanding plate and sandpaper. This type of sander spins its sanding plate in addition to moving it in a circular-type motion, creating a “random” orbital movement pattern. An orbital sander has a square-shaped sanding plate and sandpaper, while a random orbital sander uses a round sanding plate and sandpaper. Due to its multiple motions, it is much less likely to leave scratches or marks on the surface, compared to a regular orbital sander. A random orbital sander is probably the best electric sander choice for the average homeowner and occasional user, especially for larger areas.
Disc Sander
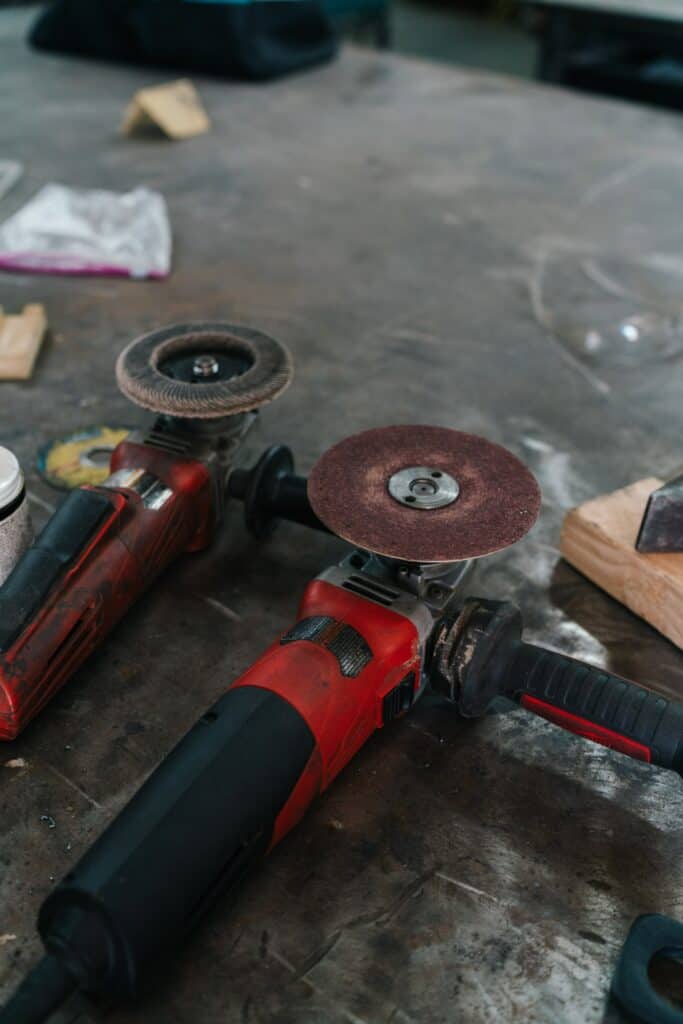
A disc sander is lightweight and portable; thus, it is very easy to use. It consists of sandpaper wrapped around a wheel that is electrical-powered. This electric sander is good for removing rust and shaping a curved surface. The sander offers a firm grip, provides better control, and usually comes with a side handle for two-handed use. Besides that, it is not very expensive, making it a good choice if you look forward to smoothing out irregular surfaces. But I would choose an Orbital or Random Orbital sander to sand large and flat surfaces over a disc sander.
Detail Sander
A detail sander resembles a small steam iron and is sometimes called a finishing sander. It usually has a triangular or diamond-shaped-sanding plate, making it suitable for tight corners and curved spaces. You can also use a detail sander for smoothing surfaces around chair spindles. It will do the job if you want accurate results in cramped areas such as hollow core doors. A detail sander is packed with features like low vibration, knives, saw blades, and more to improve functionality.
Oscillating Spindle Sander
An oscillating spindle sander can be used for smoothing out the edges of lumber. It consists of a drum that comes out of a benchtop. When the electric sander is on, the drum moves up and down on the spindle. This allows the drum to come in contact with the bare wood. You can also choose to change the drum size according to the work required.
Wet Sanding vs Dry Sanding
Dry sanding is the most common sanding mechanism used for walls and wood. You just need sandpaper or any sanding tool to remove rough paint from wood or walls. It is ideal in many cases, although dry sanding creates a lot of mess and can more easily leave scratches and dents. This is because the sawdust gets stuck in the sandpaper crevices. But there is a way around it.
Wet sanding can be done on wood panels when you don’t want the sawdust flying around, although it requires getting the wood slightly wet. It is usually done with water by rubbing the surface with a wet-tack cloth to catch the small sawdust particles from the surface. This gives you a clear view of the sanding surface to pick up any small irregularities left.
Here is a quick guide to wet and dry sanding your wood doors.

How to Dry Sand
Here are some quick steps to dry sand any surface.
Prepare the surface: Before you decide to sand any surface, make sure you clean it thoroughly to get a good view. You can either rub with a wet cloth or a fine brush. This will pop out all the small crevices and make it easier for the sandpaper or blade to move.
Choose the right sandpaper: Not every sandpaper is made for every purpose. Different grits of sandpaper make them ideal for different conditions, just like sandstone is for a knife. Large or medium grit sandpaper can do magic if you want a thorough and quick sanding. But finer grit sandpaper will give you a smoother finish with fewer scratches to the touch.
Use protective gear: Sanding, especially dry sanding, creates a lot of dust, which can cause breathing problems and clog body pores. Therefore, you should use a face mask, earplugs, a hair net, gloves, and goggles. Furthermore, dry the sand in a well-ventilated space to ensure a clear field of view.
Work your way around different power settings: If you are working with an electric sander and don’t have enough experience or practice, get some. Start with low power settings to get a hold of the traction, and then work your way up to higher speeds. This will avoid any injuries and will give you better finishing.
How to Wet Sand
Here are some quick steps to wet sand any surface.
Choose the right waterproof sandpaper: Waterproof sandpapers come in many grit sizes. You can choose between 60 and 1000-grit sizes, so choose the one that suits your application. You should start with a grit size between 100 and 150. Smaller grits can leave more scratches, which can be challenging to conceal later.
Use breathing protection: Wet sanding doesn’t produce much dust, but it never hurts to be cautious. You can use cotton swabs for the nose if you don’t have a specialized mask. You should also use sleeve-long latex gloves and a hair net.
Keep a water spray with you: You should use a water spray to dampen the surface before you sand it lightly. It could be done with a spray bottle or sprinkling some water with your hand. Furthermore, you can use a soft curve rectangular block to wrap your sandpaper around it. This gives you ease to move the sandpaper easily without strain. After all, you cannot use an electric sander on wet surfaces for obvious reasons.
Clean the surface after every while: If you are working on a paint or epoxy resin surface, you should clean the surface with a damp cloth as soon as you see fine, dry dust accumulating. Just spray the surface, clean it with some cloth, and get it working again.
Steps to Sanding a Door With an Electric Sander
An electric sander will make your job easier and is one of the most valuable tools for your DIY projects. No matter which type of electric sander you choose, there are general guidelines for using it on the door. Use this step-by-step guide to sand a door with an electric sander:
Prep the Door
Before sanding a door, you must prep it to get better results. You must remove the door from its hinges and put it on a flat surface. Some prefer sanding a door while it’s attached, but it won’t bring out the best results. Next, fill the holes and cracks on the surface with a wood filler; you can use a knife. Wait for the filler to dry, then move on to the next step.
Start Sanding
After prepping the door, load the electric sander with sandpaper. To start sanding, use the coarsest grit of the sandpaper and remove any stains or paint on the door. Start sanding with small strokes and then use long and even strokes on the surface. Also, keep moving the sander on the surface to avoid causing damage in one place. During sanding, check the door’s surface for more rough spots and give more attention to them.
Finish Up
Once you’ve sanded the door completely, wipe away all the dust and residue using a damp cloth or vacuum. If you plan to paint or stain the door, you can do it now. Once you’ve painted the door and it has dried up, attach it to the hinges. That’s it! Now you can enjoy your freshly sanded and perfectly painted door.

Best Sander for Sanding a Door
You can virtually use any sander to remove paint from wooden surfaces, but the final results vary greatly. Orbital sanders are usually your best option in most cases. But which orbital sander should you buy? We have shortlisted three orbital sanders for you to try. So let’s dig into them.
DeWalt DWE6423K
This DeWalt orbital sander is ideal for many professionals and has been a go-to product. It has excellent build quality with some smart engineering put into it. This lightweight, short heightened electric sander is easy to operate with one hand. It has a balancing counterweight to reduce vibrations for more control while maneuvering. Furthermore, it has a dust-sealed switch to protect your internal circuits from clogging and overheating. Finally, it is specially designed to change sandpapers easily with its 8-hole hook.
Pros
- Variable speed dial for power control
- Dust-sealed switch for longevity
- Easy to use and handle
- 3.0 AMP motor
- 8,000 to 11,000 RPM speed control
- Seamless dust collector
- The dust collector can be attached to a standard vacuum hose.
Cons
- Cannot be connected to all vacuum hoses
- Tricky to reach the on/off button
Makita BO5041 5″ Random Orbit Sander
The Makita Random Orbit Sander is another excellent option for paint removal and epoxy varnishes. It has a wider base that distributes the weight better than a tall sander. It comes with a pistol grip with a drill-type trigger for easy maneuvering. It has a secondary handle that can be adjusted according to your preference. However, it is still a very lightweight machine. It has all the perks of a heavy-duty sander to help you work in tighter spaces. It also comes with a dust collector, although it is pretty ordinary and doesn’t have a default hose for the vacuum hose. However, you can buy one separately.
Pros
- Variable speed dial for power control
- 3.0 AMP motor
- 5″ 8-hole hook and loop abrasive discs
- Dust-sealed switch
- Easy to use with one hand
- Wider Speed Range from 4000 to 12000 RPM
- Quick-Change Disks
- Adjustable Second Handle
Cons
- Very standard dust collector
- No default hose to connect with a vacuum
TACKLIFE Orbital Sander
If you are planning to buy your first electric sander for your own DIY project, Tacklife is another good option. This is the best budget option if you are looking for a quality electric sander for your first home improvement project. It has a clean, simple, and highly ergonomic-friendly design. The rubberized grips make it easy to hold for long durations. It delivers the same power as its high-priced competitors and comes with a palm switch. You can turn it on and off without much movement. It also comes with many sandpaper discs for a wide variety of preferences. The self-contained dust collector is also very handy, although it can also be improved a bit. Altogether, this is the perfect package in this price range.
It also has a semi-variable speed control with six different speed settings and a maximum of 13,000 OPM.
Pros
- Easy to use
- Doesn’t generate a lot of noise
- 3.0 Amp (350 Watt) motor
- 6 Different Speed Settings
- Can go up to 13000 OPM
- Rubberized grips for easy handling and maneuvering
- Easy-to-clean self-contained dust collector
- Comes with 12 sandpapers discs
- Budget-friendly power tool
Cons
- Smaller than most orbital sanders
- Not recommended for use on walls
- No connector hose for connection to a vacuum
Frequently Asked Questions
1. How to use a sander?
Electric sanders are very straightforward to use. But you have to be cautious. Always make sure to use protective gear and rubberized shoes. Always wear a face mask and latex gloves for extra protection. You should always have a fine brush to make things tidier and more effective. Another thing to consider is using the right grit sandpaper suited for the surface shape and your desired finish.
2. How to use an orbital sander?
Orbital sanders are very easy to use but tricky if you don’t use them properly. Orbital sanders are very powerful and can remove a lot of wood or paint if used randomly with hard hands. Always use them without the added pressure and move them sideways or in circles. Also, don’t use them at an angle if you are unfamiliar with the plate angle. Take your time with it, testing it out at different speeds to remove the materials slowly.
3. How to sand the wood with an electric sander?
Firstly, secure the sander firmly once you turn it on. These are power tools with high RPM sanding plates, so secure the plates properly and use protection. Start by testing out slow speeds on test surfaces. Once you get the hang of it, move around on your project surface and work with slow, light hands, moving from side to side. Check the surface while cleaning it with a damp cloth or a fine brush. Don’t use it on wet surfaces, as there is always a risk of electrocution.
4. What is the best sander to remove paint?
An orbital sander is one of the most suitable options for removing paint. Their design allows them to move quickly on the surface. It includes many features that make it the best sander for removing paint. These sanders have ergonomic handles that give the user more control over the surface. You can also use an orbital sander to feather the peeled paint before prepping or priming the surface for painting. An orbital sander can provide a smoother finish and is ideal for removing paint from flat surfaces.
Conclusion
Hand sanding a surface can take many hours, even days, if you work in your home garage. However, if you have an electric sander, you can get the job done in just a few hours or less. You might argue that sometimes it is better to work with very fine sandpaper for more precise sanding. For example, you can use finer grit sandpaper in those narrow corners. However, you can use a palm sander or detail sander for that purpose as well.
Electric sanders can be the ideal tool for all those wood repairs you want to do yourself. But you should work with small, safe tools first, working your way up to the more heavy-duty ones. I hope you now have a good idea of the options available to get the job done right.
Amazon and the Amazon logo are trademarks of Amazon.com, Inc, or its affiliates.

